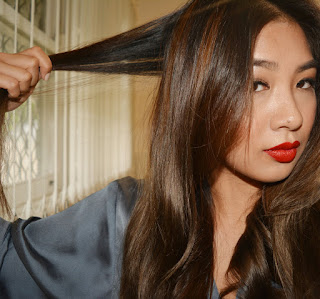
HOW I CURL MY HAIR - LOOSE WAVES TUTORIAL
3:53 PMI was constantly asked what tools I used to curl my hair and how I curl my hair. Here is a quick and easy guide to achieving those loose and effortless waves. Note that the flash results in my hair showing up more of a chocolate brown than my true ash brown color :(
1. Heat protector
I've been loving Bumble and Bumble's Hairdresser's Invisible Oil Primer. I spray this to damp hair before blow drying and to dry hair before curling to protect my hair from further damage.
2. Section your hair in half
I'm not one to fiddle with 20 clips just to curl my hair and so I tie half my hair up with my plain old hair elastic. Fancy stuff.
3. Curl away from the face
I'm using my 32mm Babyliss Pro Ceramic Curling Iron which I have dropped and broken the tip off. For shorter hair lengths I recommend a curling iron that is smaller in size.
I split my hair in half and let it rest in front of my shoulders. The curled sections are then thrown over my shoulders, I have a great system in place hehe.
In about 3-4cm sections, I clamp a few centimeters away from the root of the hair and curl away from my face, opening and closing the clamp whilst rotating to collect more hair until I've covered the entire length. I repeat this on the other side. I find that curlers with clamps are great for beginners and less fiddly i.e. less burns to the fingers for all you people in the clumsy club with me.


It should look something like this...
4. Let down the rest of the hair
Once again, curl away from the face but starting from the back of the head, making your way towards the front of the face. Your fringe and front sections should be the last to be curled. Remember my curl and throw behind the shoulder system!
In about 3-4cm sections, I clamp a few centimeters away from the root of the hair and curl away from my face, opening and closing the clamp whilst rotating to collect more hair until I've covered the entire length. I repeat this on the other side. I find that curlers with clamps are great for beginners and less fiddly i.e. less burns to the fingers for all you people in the clumsy club with me.


It should look something like this...
4. Let down the rest of the hair
Once again, curl away from the face but starting from the back of the head, making your way towards the front of the face. Your fringe and front sections should be the last to be curled. Remember my curl and throw behind the shoulder system!
It should end up looking something like this...
5. Brush
I give both sides a gentle brush in a downwards motion, lifting with each stroke to avoid breaking up the waves too much. I use this Tangle Teezer knock off I found in Trade's Secret for $3. It works just as well! Use your fingers to break up the waves to your liking or continue brushing to soften the waves even further.
For everyday wear I don't use any hairspray, I like how the waves drop throughout the day. However, for a night out I'd definitely give it a good spritz to make sure the waves hold throughout the night.
VOILA!
Without flash (my true hair colour)
With flash
Let me know if this was any help to your hair curling routine and whether you'd like a post about my hair care routine, cut and color! Wishing you all a lovely day and a beautiful start to 2016.


7 comments
Love your work! Lip and brow tutorial please x
ReplyDeleteThank you!! The brow tutorial is definitely coming up soon :D Would you like to see a how to lips tutorial? liquid lipstick etc?
DeleteYessss! Thank you for this! Finally bought a hair culrer today and searched for your blog post on curls straight away! XD so excited to try this when i get home! You make it look so easy!
ReplyDeleteLet me know how it goes! definitely had you in mind whilst writing this post <3
DeleteI'm showing this to my Sista!
ReplyDeleteDo you use an oil after for shine?
ReplyDeleteThanks for posting. I like this post very much. Dry hair may result from using of excess heat exerted from curling iron or straightener. So choose the best hair curling irons in India at a reasonable price from "Indias The Best".
ReplyDelete